Gearbox Breather Tank for Astra H VXR/M32 Gearbox, also suitable for 1.9 CDTi Astra H, and equivalent Zafira models.
This breather tank kit is designed specifically for track day/race use but can also be fitted to road cars. It allows for the gearbox to breathe when the oil gets hot and also allows an additional half litre of oil to be used in the gearbox, which helps to prolong the time it takes for the gearbox oil temperature to increase to temperatures where the oil can go out of grade.
Here is a brief fitting guide (on Astra H VXR):
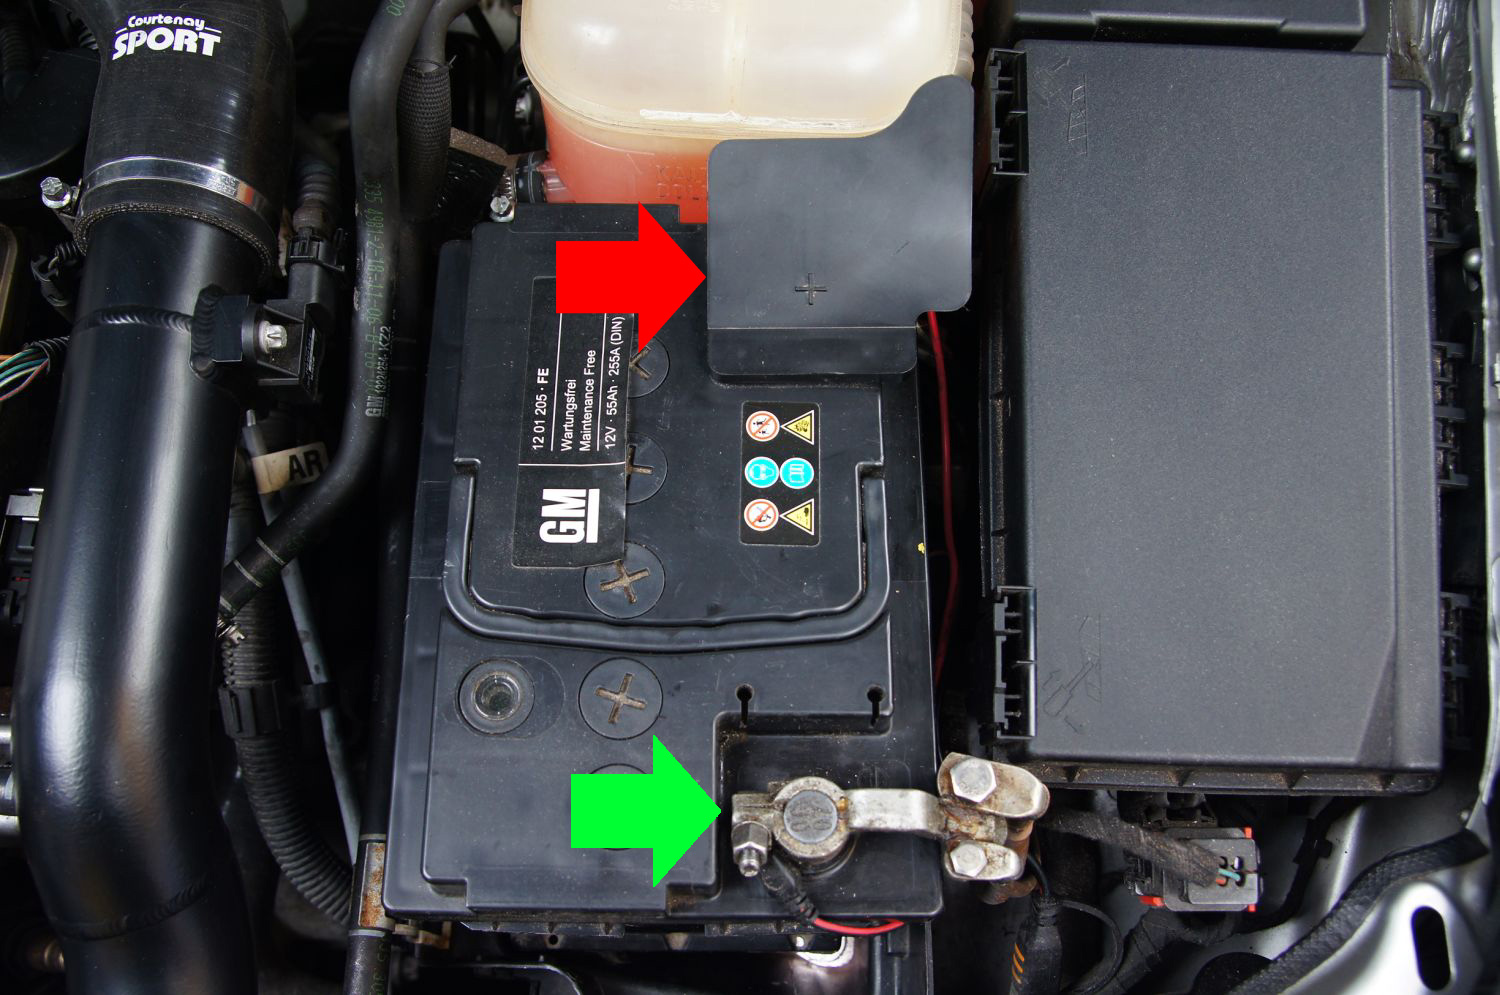
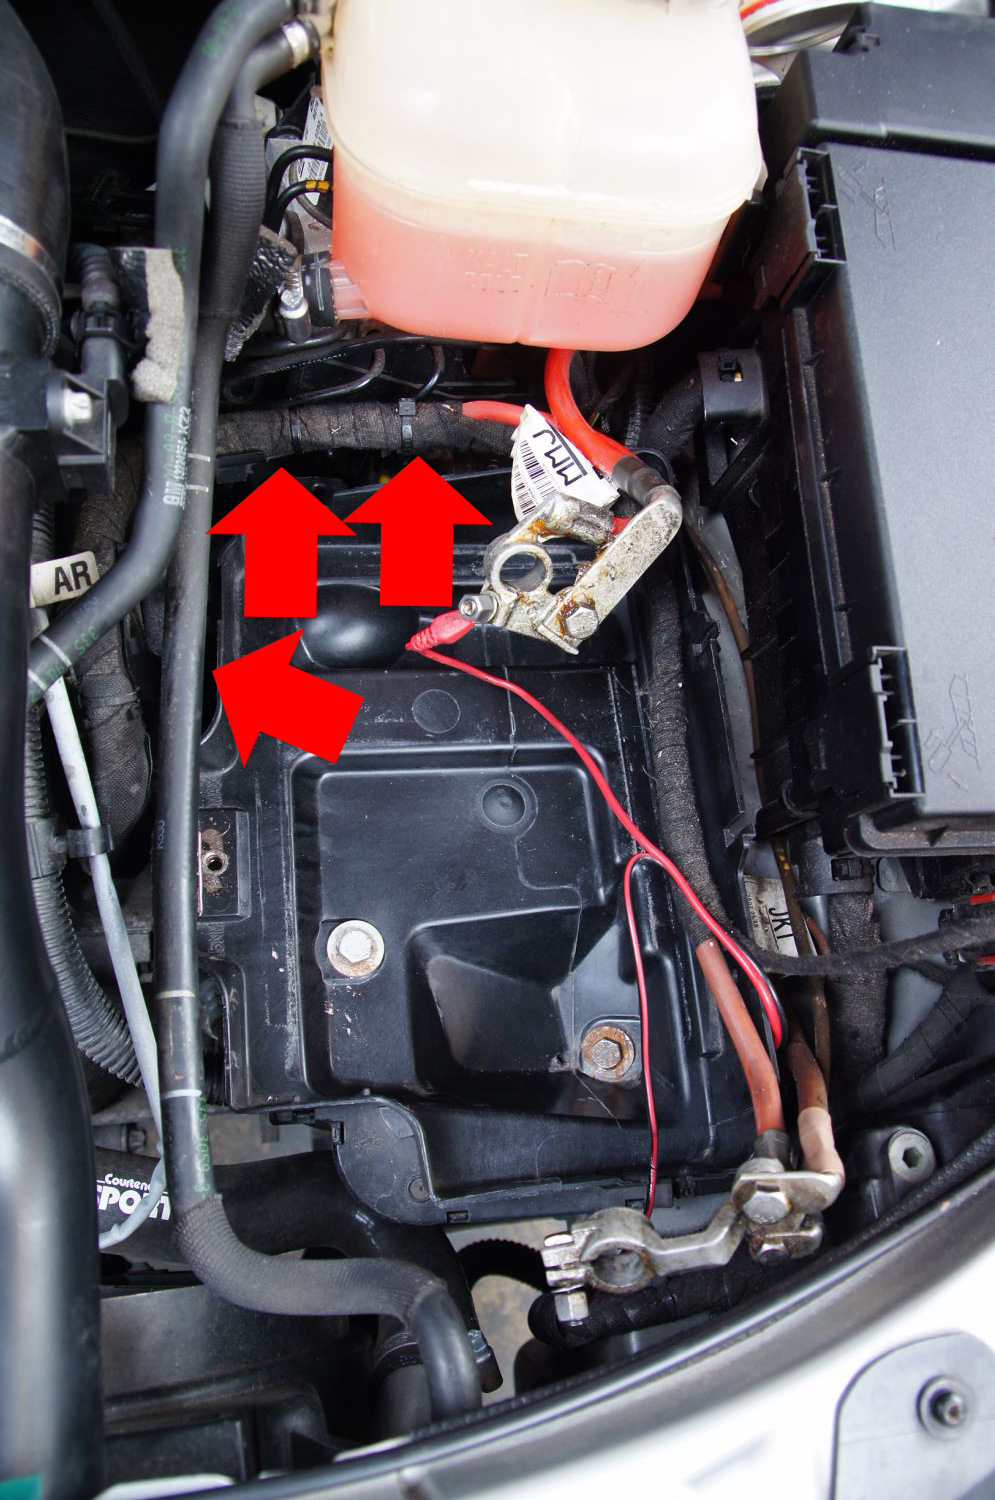
Disconnect the battery. To ensure the alarm siren doesn’t sound, turn the ignition on with the engine off (turn off all other electrical drains, such as the radio etc). Disconnect the negative lead first (Green Arrow) then the positive lead (Red Arrow). Leave the ignition in the ‘on’ position. Use a 10mm deep socket and ratchet.
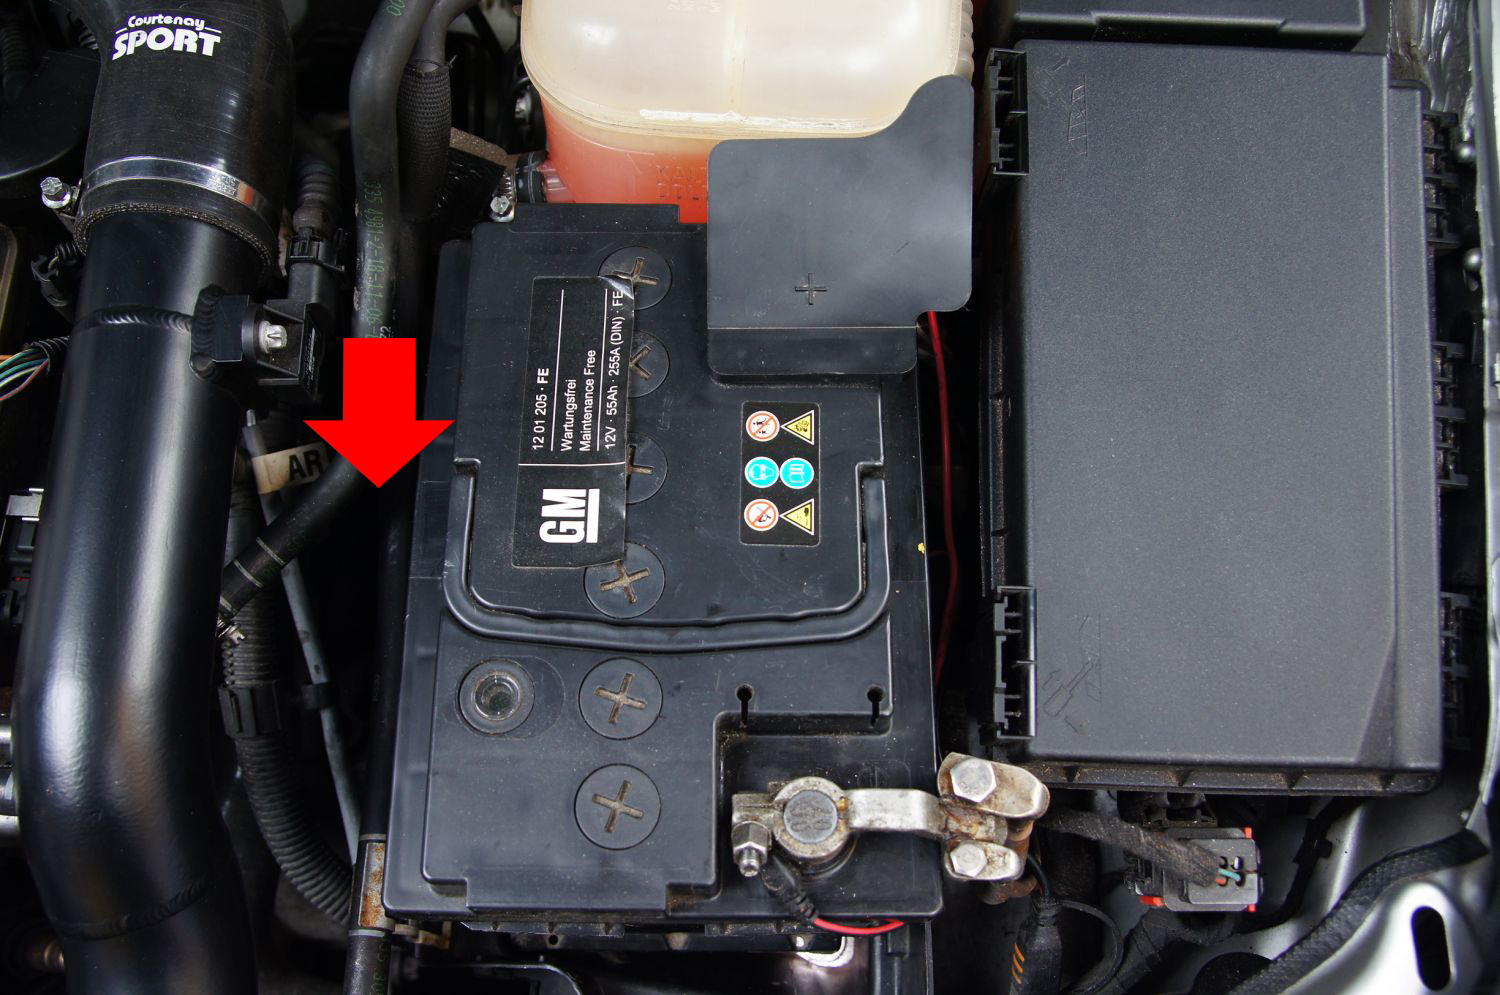
Undo the battery clamp bolt, located at the left had side of the battery, using a 13mm socket and extension with a ratchet (arrowed but hidden in the image below). You may find on Astra H CDTi models it is easier to access the battery clamp with the turbo hose, that runs to the left of the battery, removed. Astra VXR will have plenty of clearance.
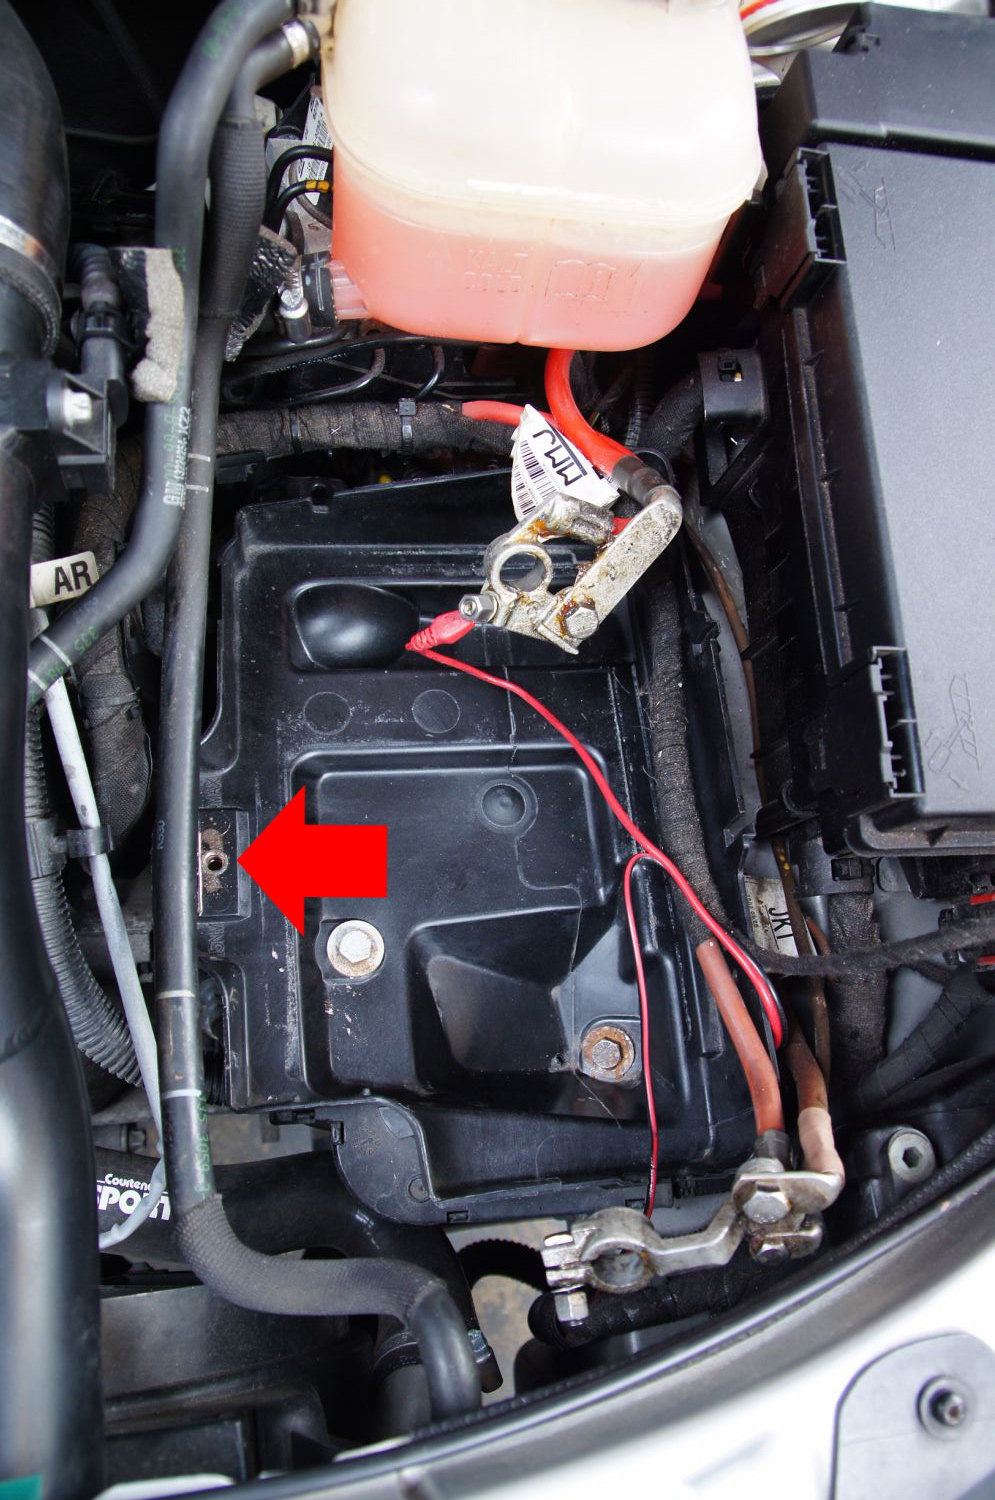
Battery clamp retaining location shown with battery removed.
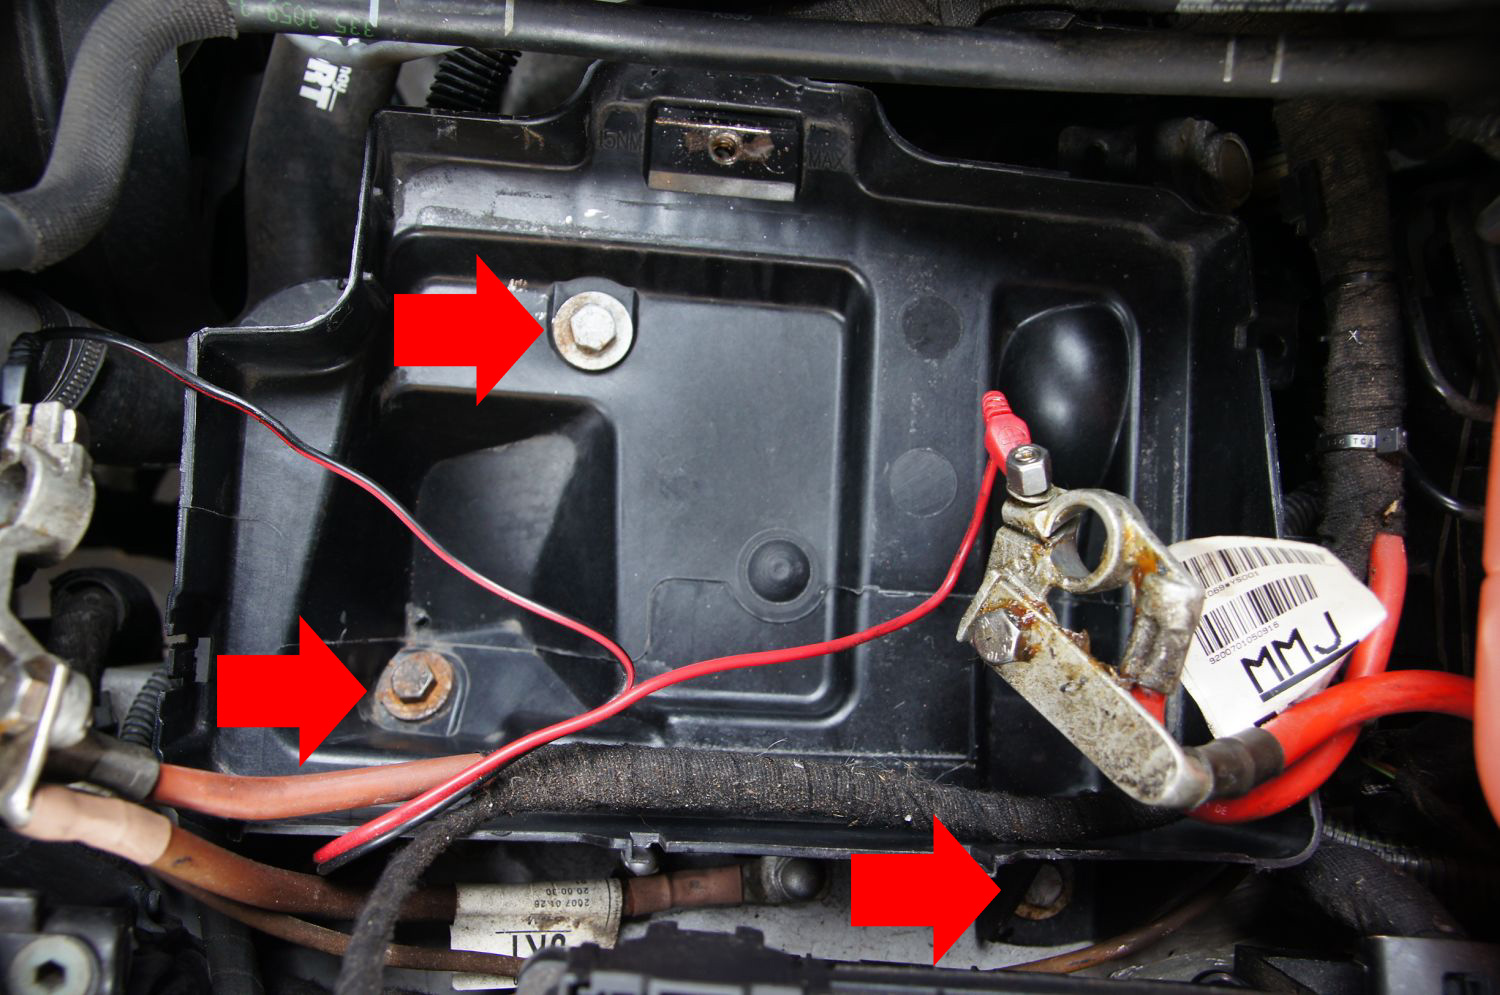
Remove the battery tray. Undo 3 x 13mm bolts arrowed.
Unclip the wiring harness from the battery tray – 3 points and lift the battery tray clear.
Remove the plenum hose (2 x Hose Clips) from between the map sensor pipe and plenum. Block off to prevent anything dropping in by accident.
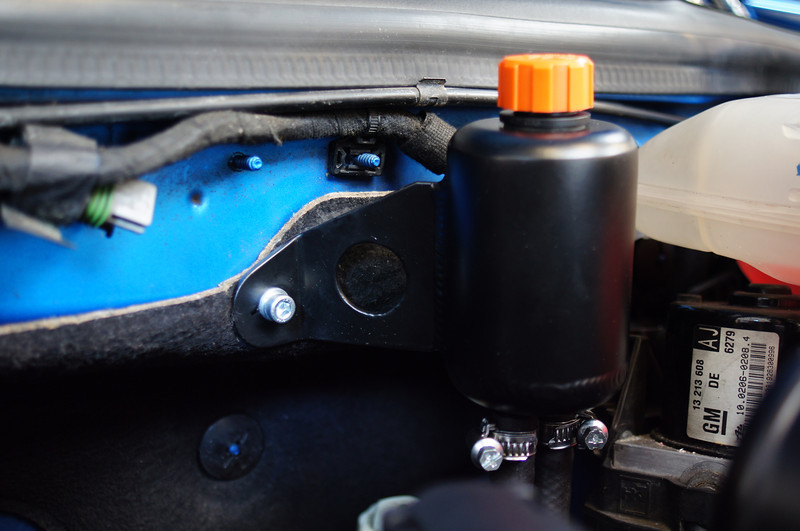
Offer up the catch tank to the bulkhead (next to the header tank) and mark where to install the captive nut (See Image). Ensure adequate clearance either side and above. Carefully pull the sound deadening material down, out of the way and mark the bulkhead prior to drilling.
Check behind the bulkhead for clearance on the wiper motor wiring behind. You may need to carefully lift the scuttle panel up a little to gain enough access. Drill a suitable pilot hole, followed by an 11mm hole to accept the captive nut (supplied). Paint/apply rust proofer/waxoyl around the hole as required. Insert the captive nut through the bulkhead and secure using a jacknut installation tool.

Make a hole through the sound deadening material to line up with the captive nut behind. A hot soldering iron works well if used carefully (See Image).

Attach the breather tank temporarily using the M6 bolt and washer to hold in place, but do not fully tighten yet.
Attach the 10mm pipe on to the OE breather on the top of the gearbox (Shown top left in the image below). You may find a little heat/hot water is required to allow some ‘give’ to the pipe to make fitting easier.

Clean around the factory filler plug to remove any foreign material. Remove the factory filler plug. Take care to make sure nothing drops into the gearbox – dirt, debris etc
Check the gearbox oil level and adjust/top up with additional oil quantity as required.
Fit the adapter into the top of the gearbox using the sealing ring (Shown Below Centre). Nip tight – do not overtighten – using a deep 22mm socket
Attach the 8mm pipe to the newly fitted adapter (Shown Below Middle). You don’t need to tighten the hose clips at this stage.

Offer up the pipes to the breather tank on the bulkhead. Measure and mark the require length and then remove them both from the car and cut carefully to length. Note the route the hoses take to the left and in front of the linkage and ensure they do not snag on the gear linkage/cables. The pipe run works best if the 8mm pipe is routed above the 10mm pipe. (Note: Measure twice and cut once).
Refit the 10mm pipe to the OE breather point on the gearbox and secure with one of the hose clips – you’ll find the hose clip needs to be right at the bottom of the pipe. Refit the 8mm pipe to the adapter and secure with a second hose clip.
Route the pipes to the breather tank and fit them onto the tank; secure with the two remaining hose clips. Note the spigots on the tank are different sizes. One for the 8mm pipe and one for the 10mm pipe. A little silicone spray helps slide them onto the breather tank spigots. Tighten the retaining bolt securing the header tank to the bulkhead.
Refit the map sensor to plenum hose.
Check for clearance of the pipes underneath the battery tray. The supplied small cable tie will secure the 2 pipes together near the linkage and help keep them out of the way.
Once happy with the positioning of the pipes, carefully refit the battery tray (3 x 13mm bolts), the battery (re-secure using the clamp – 1 x 13mm bolt) and reconnect the battery – positive terminal first, negative second (make sure the ignition is still on). Then turn off the ignition.
You must log in to post a comment.